A well-functioning heating system is the key to a comfortable stay in the house without regard to weather conditions. Along with traditional radiator technology, heating circuit devices actively use a warm water floor system. Its installation is laborious and financially expensive, but this option of heating fully pays for itself in 5 years.
To save money, many equip a warm water floor in a private house on their own. Agree, the idea of obtaining efficient heating with minimal investment is very attractive, isn't it? However, its implementation requires the contractor certain knowledge and skills.
We offer for consideration a detailed material on the arrangement of water heated floors. The article outlines the design rules, provides tips on choosing the components of the system, and also describes the step-by-step progress on the installation, connection and start-up of the water circuit.
Installation conditions for the water floor
The device of an additional heating circuit is recommended to be included in the project before the start of construction - it is easier to make calculations.
In a finished new house or building where the radiator system has been operating for a long time, installation of a water floor is also possible, but under certain conditions.

The advantages of water heating have long been appreciated by residents of Europe and Russia: it effectively heats rooms, saves expensive energy, creates the most comfortable atmosphere in bedrooms, bathrooms and children's rooms
If the desire to insulate the floor arose after the construction of the house, it should be determined whether the building is suitable for this. One of the main conditions is pre-made insulation of the house, since heat loss above 100 W / m² will make floor installation useless.
Pay attention to the height of the ceilings: the mounting “cake” with pipes takes about 15 cm, or even more, of the total height of the room. After the introduction of the system, the dimensions of the doorways must be preserved, the height of 210 cm or more.

Special requirements are presented to the base. It must be strong, even, clean. An unstable base will lead to irregularities, and those to the deformation of pipes with a coolant
If the house is new, then before starting the installation it is necessary to completely finish the construction - to erect the walls and ceiling, insert windows, and plaster.
Design and assembly rules
The decision to choose a water floor, and not requiring a rigorous installation of an electrical analogue, is optimal for heating systems on gas boilers.
Such schemes are recognized as the least energy-consuming, most efficient and inexpensive to operate. Solid fuel boiler options are also acceptable.
Flawless operation of the system is possible only under two conditions: professionally executed design calculations and properly completed installation.
Therefore, the first steps on the way to the installation of a water heated floor in the country or in a private house are the analysis of the structure, the choice of materials, the preparation of the project.
The nuances of the device of a warm floor
The construction of a water floor is complex and simple at the same time. It is multicomponent in composition, so the main thing is to observe the stacking order of all layers.

The “wet” type scheme is recognized as universal, in which the contours of the water floor are laid on a heat-insulating layer and poured with cement screed on top
Each element of the "pie" has a special function. The basis for the construction is soil or concrete slab. A thin film is laid on it (but not less than 0.1 mm thick) - ordinary polyethylene or a more expensive analogue.
Then cover the floor with insulating material. One of the best options is extruded polystyrene foam - durable, relatively inexpensive, with low thermal conductivity.
Minimum Requirements:
- density - from 40 kg / m³;
- thickness - from 300 mm.
The main layer is cement filling, inside which pipes with a coolant will be located. Plasticizers are added to the solution to make it more mobile and convenient for styling.
For strength, the screed is reinforced with a reinforcing mesh with a cell of 50 * 50 mm or larger 100 * 100 mm and a core thickness of 3-5 mm.

Finishing layer - heat-resistant floor covering. Ceramic tiles that conduct heat very well are recognized as the best material. When buying linoleum or laminate, you should choose products with a special label “warm floor” (+)
The thermal regime will depend on the choice of finish coating, which can be adjusted automatically or manually by means of mixing units - collectors.
What laying principles to adhere to?
First, you need to make calculations. This is a separate and complex topic, however, for independent quick calculations, you can use the online calculator, scoring individual parameters in the necessary columns.
If the construction company is engaged in underfloor heating, then the settlement operations are carried out by its specialists.
As a calculation basis, standard verified numbers are taken, which must be adhered to regardless of the installation method and specific installation conditions.
Image Gallery
Photo from
The temperature of the TVP in the kitchen should be between 22-27 ° С, in the corridor or hall - 30 ° С, in the living room, in the nursery or in the bedroom - 29 ° С, in bathrooms or pools the highest - 32-33 ° С
If the heating medium is supplied with heating at a temperature of 85-90 ° C, then for underfloor heating it is sufficient to heat water to 60 ° C, and on the return temperature drops to 30-45 ° C
The difference between the inlet / outlet temperature parameters is affected by the length of the circuits. The generally accepted values depend on the diameter of the pipes: Ø 16 mm - loop length up to 90 m, Ø 17 mm - up to 100 m, Ø 20 mm - 120 m, although circuits over 80 m are not recommended
The distance between the curved pipes depends on the laying area: in the center of the room - 20-30 cm, in the marginal zones, near walls and thresholds - 10-15 cm, in baths, bathrooms, bathrooms, swimming pools - everywhere 15 cm
Warm floors in the children's room
Coolant pipes in the room
Layout pitch between pipes
Typically, PEX pipes are used for installation, which cannot be laid closer than 10-15 cm from each other, since there is a high risk of creases. If the thermal load on the floor is small, for example, many people like to relax in cool bedrooms, then a layout step of up to 60 cm is allowed.
Some more useful tips:
- one circuit is not divided into two rooms;
- for a room of 35-40 m², 1 circuit is not enough, at least 2;
- one side of the circuit - no more than 8 m;
- Damper tape compensates for deformation during thermal expansion.
There are exceptions. For example, if the toilet and the bathroom are small in size and are located next door, then only one water circuit is enough to heat them.
Installation methods for water circuits
The most effective types of pipe installation — the “snail” and the “snake” —were invented long ago, so there is no need to experiment with the arrangement of circuits.

There are many varieties of two popular methods, the choice depends on the configuration of the room, the length of the circuit and the temperature regime. Sometimes combined schemes are optimal
«Snake"- the easiest option to implement. Its minus is a large difference in the temperature of the coolant at the inlet / outlet. Keep in mind that the second half of the circuit will give off less heat.
«Snail»Evenly distributes heat throughout the room, but it is more difficult to perform. If the owners do not want to divide the room into warm and cool zones, then it is better to use this method.
To save pipes and improve energy efficiency, a combination of two options is often used: a “snail” is placed in the center, and a “snake” is placed along the walls. If you correctly position the hinges and calculate the pitch, then the floor temperature will be as comfortable as possible for residents.
Properly choose materials
Warm water floors are poured with screed, which means that they are planned to be used not for years, but for decades.
Given the long period of use, the choice of materials should be approached responsibly: eliminate cheap and illiquid products, select high-quality pipes, insulation, fasteners with a maximum service life.
No. 1 - we select the best option for pipes
Now two types of pipes are used - PE-X and PERT, both made of cross-linked polyethylene. The advantage of PE-Xa products is that they have a memory effect due to their 85% crosslink density.
A useful effect is that the pipes stretched by a heat carrier with a high temperature or deformed pipes always return to their original position.

PE-Xa pipes along with axial fittings can easily be bricked up in cement, while alternative PERT products with collet fittings should be left open.
The use of PERT pipes is justified if the screed will contain solid pieces, and the fittings are installed only for fastening to the collector.
Experienced builders do not recommend the use of composite pipes with aluminum foil - there is always a risk of peeling of the metallized layer. If maximum reliability and isolation are needed, then it is better to use products with reinforcement made of polyvinylethylene located inside the products.

For water floors, three standard product sizes are used: Ø 16 mm, 17 and 20 mm with a wall thickness of 2 mm. The diameter is indicated on the marking along the entire length of the pipe.
Construction companies usually work with trusted manufacturers who are responsible for the performance of their products. Well-established products of promoted brands Rehau and Valtecas well as less well-known Tece, Kan, Uponor.
Read more about the choice of pipes for laying water floor heating in this article.
No. 2 - determined with a heater
The main purpose of the insulation is to separate the screed with pipes from the base, so that heat transfer is carried up, and not go to the ground in vain. A heat-insulating layer is required, without it, installing a warm floor loses its meaning.
Now two types of substrates are used, since the rest are losing to them in all respects. These are extruded polystyrene foam in the form of plates and profile mats made of polystyrene foam with mounting protrusions.

Extruded polystyrene is popular for its mechanical strength and low thermal conductivity. It practically does not leak moisture, which is important for pools, bathrooms, baths
EPPS plates are convenient for installation and have standard sizes: 600 * 1250 mm, 500 * 1000 mm. Thickness - from 20 to 100 mm, its choice depends on the required degree of insulation. Thanks to the fixing side grooves, there are no gaps at the joints of adjacent plates.

Profile mats make pipe installation much easier, but many refuse to buy them because of the high cost, especially of well-known brands. The thickness of the sheets is less than that of EPPS - 1-3 mm
How to determine the required thickness of the insulation? It all depends on the installation conditions in a particular private house: 10 cm slabs are laid on the ground, 5 cm is enough above the basement or basement, and if there is a heated room below, then 3 cm heat insulation is enough.
For fixing plates to the floor, dish-shaped dowels are used, and for fixing pipes - harpoon-clips. The distance between adjacent brackets is from 30 cm to half a meter, in places of pipe turns - 10 cm.
No. 3 - we buy accessories for a collector
The distribution center of the coolant and the control point for the functioning of the warm floor are a collector-mixing unit. With its help, hot water is sent from the highway to separate circuits, they monitor the flow of coolant, regulate the temperature.
Assembled collectors are not sold, as each system has its own characteristics. It is better to entrust the purchase of components to specialists, and for independent purchase you should remember about all the necessary elements:
Image Gallery
Photo from
The design is based on the distribution units themselves, which are equipped with valves, thermostatic and balancing valves for ease of adjustment
Fittings are selected, focusing on pipes for heating circuits: both the material of manufacture and size are important
An automatic air vent is part of the safety group and serves to remove air from the circuit. If it is absent, air jams may occur that paralyze the system.
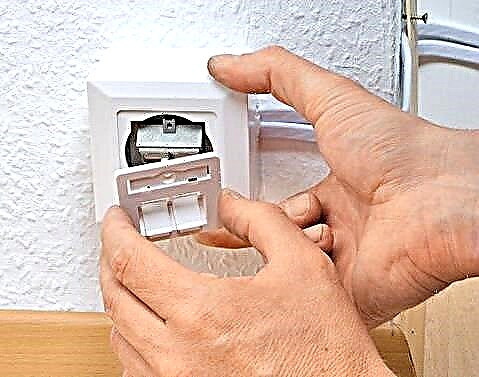
Usually the collector-mixing unit is mounted in a corridor or a niche, and it is fixed to the wall with bolts or brackets. Floor mounting possible
If water from the circuits needs to be drained, use a drainage drain valve. It also removes air from the pipes when filling them with coolant.
In order to service the ECP it was convenient, and the open elements of the system were protected and looked neat, the collector was enclosed in a special metal cabinet
An additional node is necessary if a separate riser is not allocated for the VTP. The unit must contain elements such as a bypass, a pump and a thermostatic valve.
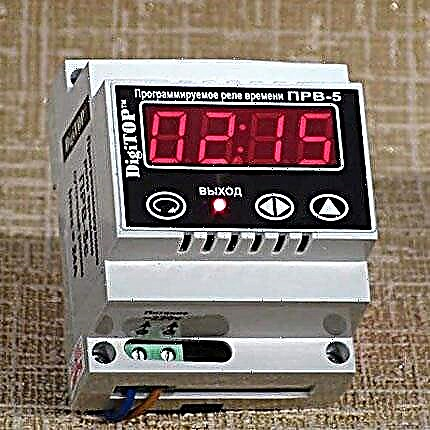
You can control the temperature in the circuits using a thermometer. If the water in the mains is hotter than necessary, it is recommended to install a limiter
Pipe fittings
Automatic manifold air vents
Wall mount brackets
Drainage taps for draining
Metal manifold cabinet
Mixing unit with pump
Thermometer or temperature limiter
The installation location often depends on the nuances of service: one is more convenient to adjust the ECP in the boiler room, together with the boiler, the other - from the corridor. Theoretically, a manifold cabinet can be installed in any room of the house, but it is desirable that the length of all the circuits is approximately the same.
Assembly instructions for TVP
Before laying the construction of the warm floor, preparatory work should be carried out: purchase components, outline the installation location of the cabinet, and hollow holes in the walls for communications. Then you can proceed to the first stage.
Step # 1 - Subfloor Installation
If it is planned to equip a warm floor directly on the ground, it is recommended to choose one option from two:
- make a “rough” screed from cement pouring;
- instead of screed, pour, compact and level the sand.
A layer of sand is required in any case, since it serves as the basis for the screed. They put a layer of waterproofing on it, the most elementary option is a thick plastic film.

Compaction and leveling of the sand layer are very important. Small hollows up to 5 cm deep are allowed, but for pipe installation it is better if it is perfectly smooth
In the calculations, it should be remembered that the heat loss during installation of the system on the ground is higher, therefore, the temperature of the coolant in the pipes should be higher than normal.
Step # 2 - laying the insulating layer
The insulation is laid on a clean, flat floor. Before starting work on the walls beat off a strip - the level of a clean floor, small cavities, if they formed during the construction work, are covered with clean, dry sand.
Assembly instruction:
- Spread waterproofing - lay sheets of film with a density of 150-200 microns to overlap with an overlap of at least 10 cm and wrap on the walls.
- Lay the plates of extruded polystyrene foam with the marking up, joining the grooves with each other. Better to start from the far corner.
- If necessary, cut fragments with a construction knife.
- Fasten the plates with dish-shaped dowels at the corners, in the middle of the joints and in the center of the plates.
- Seal the seams with construction tape.
If you need to lay the second layer, then the direction of the upper plates is better to change, that is, put them perpendicular to the bottom.

When laying, avoid large gaps and crevices. If they do form, voids can be blown out with foam or covered with polystyrene scraps
To move around the plates during installation, it is recommended to lay thin boards or pieces of plywood - the structure of the plates, despite the density, can be deformed.
Step # 3 - marking and placement of pipes
Markings are applied to the surface of the plates using a marker or masking cord. If profile mats are used instead of EPPS, marking is not required.

There is a risk of creasing and twisting of the pipe during unwinding, so it is better to use a specially designed device for unwinding the bay. Manually unwind will take longer
Before starting the installation of pipes, it is also advised to install collectors and prepare places for connections.
Assembly instruction:
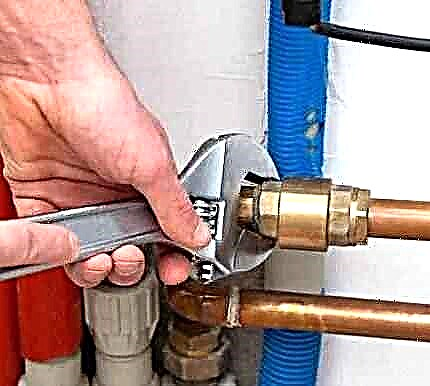
- Unwind from the pipe 15-20 m, put on the end of the insulating sleeve and fitting for connection.
- Connect to the collector.
- Carefully lay the pipe according to the marking.
- Secure the contour with harpoon brackets.
- Bring the pipe to the manifold, attach the second end.
The length of each loop must be fixed, and not just memorized, but written down near the fitting on the wall.

At the edges, a damper tape or some substitute is laid - for example, pieces of polystyrene foam 1.5-2 cm thick. They hold well on liquid nails
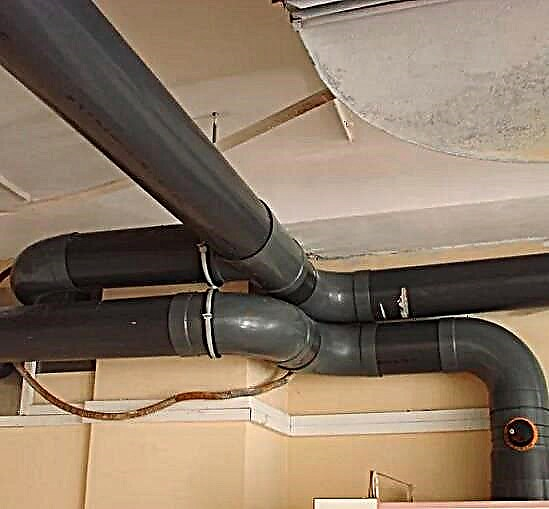
Transit pipes passing through walls or transition zones are maximally insulated with sleeves. Instead of expensive imported products, you can use ordinary insulation - foamed polyethylene.
Step # 4 - mounting the reinforcing mesh
Correctly laid fittings should be above the pipes, not under them and not between them. An acceptable option is a metal mesh with a cell 10 * 10 cm from a 3 mm wire.

It is also wrong to fix the contours to the metal mesh, in this case it will serve as a stand, not a reinforcement. Proper styling - when the grid is above the pipes
Now many people use plastic instead of wire mesh. This option is also suitable, since the polymer creates the necessary rigidity.
Step # 5 - system testing
Until hydraulic tests have been carried out to check the tightness of the system, the screed must not be filled. Typically, circuits are checked in turn.
First, the line and pump are connected to the pipe, water is supplied. For removal use a hose connected to the drain pipe of the manifold.

A pressure pump is the best tool to test the system. It can be rented. You can also hire a specialist who usually has the necessary tools for testing.
During the test, the brackets can fly off, as the pipe tends to straighten under pressure. The flying off harpoons are fastened 5 cm from the previous place, after pouring the screed it will not fly off.
Step # 6 - laying the cement screed
The pipes are left at a pressure of 5 bar and begin to lay the screed. Usually apply the traditional beacon method. As beacons, you can use a metal profile for drywall.

The usual mortar for screed is not suitable, plasticizers and fiber must be added to the cement, since the load will be not only mechanical, but also temperature
Laying is carried out in parts, starting from the far corner. Each fragment immediately after pouring must be aligned, eliminate dips and flows.
After 2 days, the surface is cleaned, the damper tape is cut, the screed is sprayed with water and covered with a film (the last two steps are repeated 10 days).
Commissioning
Full maturing of the cement screed occurs in a month, it is then that it is necessary to balance with the help of manifold flow meters.

Using balancing valves regulate the flow of coolant, in all circuits it should become the same. If there is no experience of self-balancing, it is better to invite a specialist
After handling cold water, if the system works correctly, it is possible to carry out tests with a heated coolant. On this installation of the warm floor is considered complete.
General installation rules for thrifty owners:
Practical recommendations of experienced builders:
What mistakes should be avoided:
When installing a warm floor, there are dozens of solutions, thanks to which you can save on accessories or choose the most suitable scheme.
If you devote more time to designing and selecting materials, then the finished heating system will fulfill its functions 100% and will not need to be repaired for many years.
Do you have personal experience in designing and arranging a warm water floor? Want to share your knowledge or ask questions about the topic? Please leave comments and participate in discussions - the feedback form is located below.