In the field of protecting the bathroom from the penetration of unpleasant aromas and gases from the collector, the correct installation of a siphon on the bath is of great importance. This is a kind of buffer between a bathing tank and a sewer.
Its purchase should be preceded by an analysis of the main criteria that affect competent choice. In this material we will talk about popular varieties of siphons, we will figure out how to choose this device. And also we will tell you a few secrets of installing these plumbing devices.
Types of siphons for bathtubs
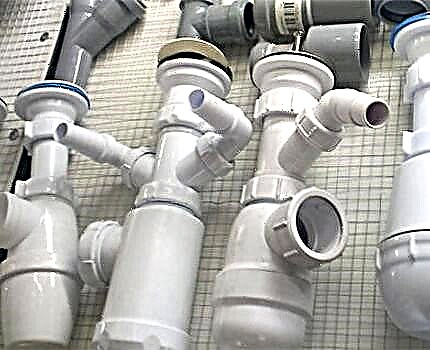
Among modern siphons, 4 of their types are most often found: corrugated, knee or tubular, with a bulb, flat. Properly selected both in design and in the material from which it is made, the siphon will ensure reliable and long-term operation.
Image Gallery
Photo from
Bath trap location
Component of the overflow system
Clogging Prevention Device
Anti-odor trap formation
Understanding device principle
Siphon cleaning under the bath bowl
A common form of bath siphon
Siphon connection to the sewer outlet
Pros and Cons of Corrugated Siphon
Among the listed species, the design of the corrugated siphon is the simplest. It consists of 2 main nodes - a slightly curved outlet and a pipe with a frame.
Easy installation is the main advantage of the device. Corrugated pipe can be placed in any plane. Its disadvantage is that if, in the event of clogging, it is necessary to clean such a siphon, then this will need to be done manually, after dismantling the structure.
A water seal is also independently formed. Use this type in case the sewerage has non-standard execution.

The installation of the corrugated siphon is simple. The outlet is connected to the bathroom, and the descent is designed for installation in the sewer
In the “pure form” the corrugated siphon, which forms a water seal by the simplest bending of the pipe, is not installed under the bathtub. Such a solution would threaten the frequent formation of congestion and would not please the complexity of cleaning:
Image Gallery
Photo from
Corrugated pipes in siphon construction
The benefits of corrugation in the arrangement of the bath
Plumbing in a convenient location
Connecting the corrugated pipe to the outlet into the sewer
Tubular siphon
The shape of the inflexible structure resembles a horseshoe or letter S in a horizontal arrangement. The barrier to the spread of unpleasant odors from the sewer is water, which is constantly present in the bend of the pipe.
High-quality siphons have a stopper at the bottom of the knee to facilitate cleaning. If there is no such detail, it is difficult to free the system from accumulated debris.
Metal siphons are part of expensive plumbing. In such systems, designers never use plastic. They are made of brass, bronze or stainless steel. The first 2 materials are oxidized if they are not coated with a special composition.

Tubular siphons can be either solid or collapsible. They are made of metal or plastic
Siphon with flask or bottle
Siphons with a flask are most often used for installation under the sink and less often under the bath. It got its name due to the presence of a kind of bottle for the accumulation of water. The flask is installed exactly opposite the drain hole, connecting by means of a rigid or corrugated tube.
If the drain pipe is flexible, a bottle siphon is used regardless of the location of the sewer entrance. Hard drain suitable for installation in the bathroom under the washbasin.

The drain is located above the bulb. The “butler” is easy to take apart and clean. Large debris does not enter the sewer, but lingers in a container
Modern flat siphon
This type of siphon is similar to knee or pipe devices. The difference is in the presence of a water trap and a horizontal flat outlet designed for the accumulation of garbage.
Before you install such a siphon under the bath, you need to consider that it can only be used when the collector line is horizontal.
The advantage is quick installation and the possibility of convenient pipe cleaning. Separately to such a siphon, you can purchase a special drain net. This will further protect the system from small debris entering it.

The flat ladder consists of a siphon itself, a lining, a flange with 3 fixing bolts during rotation, a connecting system that combines the device with a sewer pipe
Siphon classification by drain design
By design, all siphons can be divided into the following types:
- Mechanical. They have a plastic or rubber plug for the possibility of blocking the drain channel. Here, all the manipulations are performed without the use of any levers and automation - manually. The device is very simple, therefore, has a long service life.
- Semi-automatic. This is a complex design with a shut-off valve, which is controlled by cable or lever mechanisms. Such adjustment is usually placed at the overflow hole above the water level. The reliability of this type of strapping is somewhat lower due to the presence of a number of moving parts and assemblies.
- Automatic. In this case, the siphon is included in the same system with the filling device. The built-in microprocessor manages everything. The system includes an easily controlled Click-clack valve.
Automation allows you to fill the bath with water at a given temperature and maintain it. When the temperature decreases, the water is drained and the bath replenishes with warm water to the set volume.

It looks like a bottom valve for installation on any bathtub. Opening and closing is done by clicking. The model is made of brass and plated.
The click-clack design includes a locking cap fixed to a pin. It rises when a certain water column presses on it and forms a gap through which excess water flows. Automatic siphons are made from non-ferrous metal alloys.
Semi-automatic siphons are produced in 3 versions. In the first, the overflow hole is opened by pressing the drain plug. To remove the used water, simply press the lid and activate the overflow plug.

This type has a direct-flow siphon without automation. When buying a device, you should find out what metal is used to make such parts as grilles for overflow and drain holes, a tightening screw. The best option is stainless steel. To make sure that this is the case, use a magnet - ordinary coated steel is magnetized and stainless steel is not
The semi-automatic siphon design includes a special handle with a plug function for the overflow hole. To open or close it change the position of the handle. The cork is equipped with a special mechanism, by clicking on which you can both open and close the drain. Over time, the quality of work decreases due to the formation of a calcareous layer.
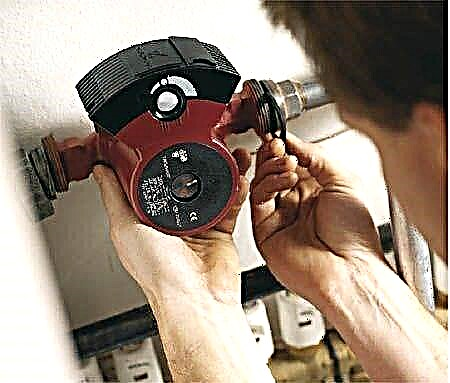
If a washing machine is installed in the bathroom, then to connect it, the siphon must be metal, because Plastic may not withstand high temperatures. We also recommend that you read the nuances of installing a siphon for washing machines.
When choosing a siphon, you should not proceed from the design of the product. The first thing that a siphon should provide is an uninterrupted operation aimed at high-quality drainage of sewage into the collector.

Structurally, the automatic siphon differs from the semi-automatic drain plug drive device and the system for entering water into the bath
How to assemble and connect a siphon?
To connect to the sewer of the bathroom, as in the case with any other plumbing fixture, it is necessary to assemble the siphon. Devices go on sale in kits where all parts are scattered.
Installing the simplest type of siphon for a bath bowl includes a number of standard steps:
Image Gallery
Photo from
Step 1: Assembling the siphon for installation under the bathtub
Step 2: Preparing and Installing the Drain Grate
Step 3: Fixing the drain grate
Step 4: Connect the siphon to the drain grate
To know how to assemble any model of bath siphon, you need to study the assembly diagram. It is identical for all types.

The siphon consists of the following parts: overflow plug (1), guard (2), gasket (3), outlet (4), connecting screw (5), nut (6), detachable ring (7), coupling nut (8 ), cone gasket (9), adapter (10), flat gasket (11), overflow outlet (13), corrugated hose (14), gasket (15), coupling nut (16), overflow pipe (17), gasket (18)
The assembly technology is as follows:
- Unpack the new siphon and check the quality of the threaded connections. Chips and burrs are not permitted. Before assembly, you need to arrange the parts in the order in which they will be connected in the future.
- A cork is attached to the overflow pad by means of a chain.
- Mount the protective grille and flexible rubber gasket on the drain hole.
- A gasket is inserted into the upper part of the branch pipe, then the pipe is pressed against the body of the bathtub so that the gasket takes the desired position and lies as tight as possible.
- With the other hand, insert the connecting screw into the grate and fix it with a nut using a wide screwdriver.
- A plastic coupling nut is put on the nozzle. A conical rubber seal is installed under it, turning the wider side to the nut.
- Insert the pipe into the knee and tighten the nut until it stops.
- A cone gasket is inserted into the coupling nut and the elbow is connected to the adapter. Using the adapter, the height of the siphon can be adjusted.
- Insert the gasket into the opposite nut of the adapter and connect the latter to the drain of the sewer.
- Corrugation is attached to the overflow outlet through a flat or conical gasket and a coupling nut.
- The corrugation is joined with the overflow pipe by means of another nut with a gasket through the bathroom body.
- A gasket is fixed to the top of the overflow pipe.
Not a single extra part is included in the kit. When something remains after assembly, it indicates that some point has been missed. If the siphon connections are leaking, leaks may occur. To prevent this, coat the joints with sealant.
In the process of connecting a semi-automatic siphon, a lamb is installed, with the help of which the drain plug is controlled. The lamb is placed on the overflow hole by connecting a pre-corrugated pipe to it from the back of the bowl:
Image Gallery
Photo from
Step 1: Lead the stem into the overflow hole
Step 2: Preparing the stock control lamb
Step 3: Locking the Lamb and Stem
Step 4: Tighten the fixing bolt
Strengthen the threaded connection by winding tow or silicone tape. A paste is applied over the windings and the parts are pulled.

The photo clearly shows how the gaskets are pressed. After the installation is completed, you need to leave the system for 5 hours, so that the sealant is completely dry
Only one seal should be in one connection. Reinsurance by installing two gaskets leads to the opposite effect - the tightness of the joints is broken. Mounting nuts and gaskets must not be pulled out, but maximum tightening can damage parts. It is better to tighten the nuts not with a wrench, but manually.
Also on our site there are other articles that describe in detail the process of connecting siphons to various plumbing:
- Sink siphon: types, selection criteria + assembly rules
- Installing a siphon in the kitchen: how to assemble and install a device + circuits and installation example
- Siphon for shower tray: design, purpose, installation features
- Siphon for washing: design, purpose, do-it-yourself installation features
- Siphon for a shower cabin with a low pallet: types, selection rules, assembly and installation
Features of the assembly of a semi-automatic siphon
The assembly of a semi-automatic siphon is complicated by the presence of additional parts. At the top of the tubular structure is a stainless steel control rod. Fix it with 3 screws of the same material. Here is the aerator.

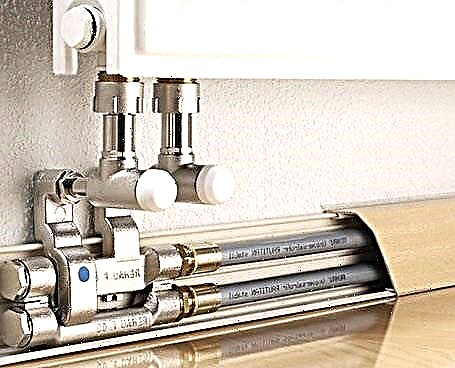
The bathroom siphon always has 2 overflows. In the photo there is a view of the central or passage and overflow overflow. The first is installed in the drain of the bath, and the second - in its end. The drain pipe is mounted on the side overflow, and the sewer is attached to the collector.
To install it requires a minimum of space. Only the siphon head is visible from above. Water is supplied from the side by means of a threaded connection.
Semi-automatic tubular siphon has a good throughput, a reliable water seal. A high-quality appliance is designed in such a way that water never flows down the wall of the bathroom.

Components of a semi-automatic siphon - 2 overflows connected by a cable and a pipe, pipe, filters, gaskets. Using the nozzle, the device is connected to the collector
Assembly is performed according to the following scheme:
- The nozzle for the collector is joined with the central overflow, pushing the pipe all the way. The gasket at the junction is already installed, so you do not need to insert anything else.
- A metal filter is also mounted on the overflow, having previously installed a double seal on the drain.
- Metal covers of a flat shape are connected to the movable adjusting cable, and then they are fastened to the drain hole. The assembly is connected to the overflow via a bolted connection.
The joints must be provided with the appropriate gaskets - the side ones with an ordinary thin sealant, and the central one - with the “butterfly” gasket.
Connection reliability check
Having installed the siphon, it is necessary to carry out a verification check of all joints. To do this, fill the bath with water to make sure that the drain neck is attached correctly. If there is no leak in this place, then there were no errors during installation.
The remaining connections are checked for reliability by removing the plug from the drain. If at some point leakage of liquid is detected, the bath is completely freed from water. After this, the joint is disassembled and reassembled, paying particular attention to the position of the gaskets and nuts.
According to professionals, the cause of the leak is most often a skewed nut connection or insufficient tightening.
Some helpful installation tips
Before assembling and installing the drain device, you need to check the level of the bathroom, the diameter and position of the drain pipe. Then you should read the instructions to take into account all the possible nuances.
When installing the appliance on an old metal or modern acrylic bath, check the drain holes. If roughness is found on them, they are eliminated with an emery cloth.
With a rough discharge, it is impossible to ensure a tight fit of the siphon to them. Before final tightening of the device, the correct assembly should be checked; laying requires special attention. Often they move, so it is better to apply a special sealant to them.
Proper drainage is ensured by the correct slope of the pipe. The drain pipe should go directly to the collector. If the siphon is equipped with several inlets for branching the drain into the collector, but they are not intended to be used, you should plug them with a special nut.
When buying a siphon, its important characteristic is the quality of the material, and if it is plastic, then the main thing is the wall thickness and processing technology. The denser the walls of the drain, the better it will resist the loads.
On cast-iron drainage, the presence of cracks, even disguised, is unacceptable. If such defects are found, it must be replaced. The surface of the brass siphon must be absolutely smooth, otherwise it will often have to be cleaned.
To avoid leaks, the seals on the drain change on average 1 time every six months, and those that are installed between the nozzles - every 3 months. To prevent scale deposits on the walls, every few months it is advisable to rinse the device with hot water with an addition in the form of citric acid.
If chemical cleaners are not contraindicated for the material, then you can use Mr. Muscle, Ruff, Phlox, and the like.
Author's workshop on installing a siphon:
Save time spent tying the bathroom by viewing this material:
A correctly mounted siphon is a guarantee of comfort and peace of mind. Hurry with its independent installation is inappropriate. If even after reading the detailed instructions, there are unclear points, it is better to turn to professional plumbers.
If you have personal experience installing a bathroom siphon, please share your knowledge with our readers. Maybe you also have your installation secrets? Write your comments, ask questions in the block under the article.