To install a washing machine, it is not necessary to call a wizard. After all, his services will cost a lot. A detailed briefing explaining how to independently connect a washing machine will help to correctly carry out all the necessary manipulations with minimal financial costs.
We will talk about how to install and connect household washing equipment with your own hands. The article we presented describes in detail the process of unpacking, aligning and connecting the unit to communications. Based on our advice, you can perfectly carry out all the work.
The procedure for connecting the machine
To start the operation of the washing device, it is necessary to choose the optimal place for its placement. Then prepare the washer for connection work.
After that, it will remain to correctly perform the following steps:
- align the device, giving it an optimal position;
- connect to the water supply for the intake of water necessary for washing;
- connect to the sewer to discharge water during the implementation of a given program (washing, soaking, rinsing, spinning);
- connect to the mains to ensure the supply of electric current, which drives the motor of the unit.
Next, we will consider in detail all of the above steps.
Stage # 1 - choosing a place for installation
First of all, you need to think about the place where the unit will be installed. Modern models that require a connection to the water supply and sewage systems have a stationary location, since their transfer is very difficult.
Rules for the location of the washing unit
For the correct location of the washing machine, the following requirements should be considered:
Image Gallery
Photo from
The floor in the room where you plan to install the washing machine should be solid and even. If the installation will be made on a wooden base, it will usually need to be strengthened
Do not put the washer on the rugs and carpets that interfere with the timely detection of leaks. Moreover, they often contribute to vibration
There should be no direct sunlight on the washing machine. If it is installed in a room with a large window, you should choose the most shaded side
A room with a washing machine must have faultless ventilation. If the natural type of ventilation can not cope, it is worth putting a fan in the exhaust outlet
Washing equipment should be installed in rooms in which the temperature at any time of the year does not drop below 0º. However, it must not be placed near heating appliances or heaters.
It is strictly forbidden to run the power cable under the washing equipment. There should be enough room in the room to freely lead the cord around or next to the machine
For normal operation of the washing machine, it is necessary to blow the case from all sides. 2.5 cm from the top and side, 5 cm from the back wall, in front of the front door 45 - 50 cm
Unhindered access should be provided to all nodes connecting the washing machine. If necessary, the water supply valves must be shut off without any special difficulties and problems with the movement of equipment
Solid floor with washing machine
Mandatory lack of carpet
Protection from direct sunlight
Providing regular ventilation
Stable temperature above 0 degrees
Enough space for a normal connection
Ventilation clearances around the enclosure
Access to water taps
For the optimal location of the machine, factors such as:
- available near water supply and sanitation systems;
- the ability to easily connect to the mains (preferably not through an extension cord, but directly);
- the presence of a flat (preferably reinforced concrete) floor;
- the size of the washer, the method of loading laundry into it, the side of opening the hatch for front models;
- free access from all sides: in addition to easy loading of linen, it is important to have a gap on the side of the wall so that you can get accidentally dropped linen or another object.
In practice, washing devices are usually placed in the bathroom, in the kitchen or in the hallway.
Determination of the room for installation
Bathroom. This is a traditional place for the machine, since in this room, which has all the necessary communications, it is easy to equip a drain and a water supply.
The disadvantages of this option are the miniature size of most bathrooms, which is why owners often have to choose compact models.

The bathroom is the usual place for washing machines. When installing in this room, it is important to follow the operating rules without violating the recommended humidity level
In addition, such spaces are characterized by increased humidity, which can affect both the state of the wiring and the serviceability of the various nodes of the “washers”.
Kitchen / dining room. This room is also often used to mount the unit, which is usually installed under the sink or next to the sink. Since this room is usually also small in size, washing here sometimes interferes with the hostess.
In addition, the temperature and humidity conditions in the kitchen also do not always comply with the operating rules of washing machines.

Automatic machines are often installed in kitchens. In this case, both built-in and conventional models can be used.
Entrance hall and utility rooms. An unusual, but quite acceptable option may be to install an automatic device in the hallway, closet, utility room or even a spacious wall cabinet. The only obstacle in this case may be the lack of easy access to communication systems.
Future performers of the washing machine installation should consider:
Image Gallery
Photo from
Location of a freestanding car
Installation of built-in washing equipment
Countertop electronic protection
Mini washing machine under the sink with a water lily
Stage # 2 - Preparing for Installation
The purchased machine is delivered to the apartment in packaged form. All rotating parts are fixed with fasteners (bolts, bars, brackets) that protect the device from accidental damage during transportation.

Before starting the installation, it is important to remove all fasteners (bolts, staples, clamps) that protect the machine parts during transportation
The brought washer should be freed from the box, and then deal with the removal of the fixing parts:
- Staples must be removed from the back of the unit, which are set for the stiffness required for the transport of household appliances. Similar elements also hold onto the flexible parts of the structure, namely the hose and electrical cord.
- Following this, remove the bars.embedded between the tank and the housing of the device. To do this, it is enough to tilt the washing machine forward.
- Bolts should also be removed.which are installed on the front of the machine for fixing the drum. It is better to immediately insert plastic plugs into the holes from the removed elements (they are usually included in the model kit).
Released fasteners must be carefully packed and stored: they may be needed when contacting a service representative.
Image Gallery
Photo from
Mounting Blot Installation Points
Loosen the bolts with the included wrench
Bolt removal with plastic insert
Collection of shipping bolts for storage
Stage # 3 - leveling the washing machine
In order for the automatic machine to serve with maximum efficiency, the installation and connection of the washing machine should be approached with the utmost care.
Particular attention is required to the floor base, which must meet a number of criteria:
- strictly horizontal surface;
- strong structure;
- sustainability;
- protection against vibration and other influences inevitable during operation of the unit.
If the foundation does not meet these criteria, it is better to take measures for their implementation.
In addition to evenness and reliability, the base for installing the washer should also have anti-vibration properties. If you have to put on a tiled or wooden floor, then the whole process is best done using devices that dampen vibration:
Image Gallery
Photo from
Pieces of felt against vibration
Anti-vibration washing stand
Round anti-vibration device
Invisible anti-vibration pads
On fragile surfaces, it is desirable to make a cement-sand screed or to strengthen the existing floors in the place of the proposed installation of the washing device.

Regulation of the position of the washing unit is achieved by changing the height of the support legs: to increase the distance from the floor they can be unscrewed, and to reduce - screw
After making sure that the base meets all the previously mentioned requirements, you can proceed with installation. The fully unpacked machine with the fasteners removed is placed in the selected place.
The top panel determines the horizontal position of the installation, while the deflection angle, which is checked on the top cover, should not exceed two degrees. Exceeding this indicator leads to a sharp increase in vibration, which very negatively affects the condition of the nodes and significantly reduces the service life of the machine.
Image Gallery
Photo from
Step 1: Screw all legs to minimum height
Step 2: Set the back support to the desired level
Step 3: Checking the horizontal position of the exposed legs
Step 4: Fine-tuning the height of the feet
It is strictly forbidden to lay improvised materials under them that can slip out from under the supports during work. This can lead to an emergency. At the same time, it is allowed (and even recommended) to put a rug of thin rubber on a sliding tiled surface.
As soon as the machine body is perfectly horizontal, tighten the locknuts counterclockwise, fixing the optimum height of the support legs.
When leveling the machine, it is recommended to consider the following factors:
- The greatest degree of stability of the unit is achieved with the maximum screwed-up adjusting supports, however this option is permissible only with a perfectly flat surface.
- When installing the machine on an inclined floor for fixing the supporting structures, it is advisable to use fixing parts.
- To check whether the unit is installed correctly, you need to try to swing it diagonally. If the process is done correctly, there is no free play or its amplitude coincides for different diagonals.
After making sure that the unit is in the correct position, you can proceed to the next steps.
Stage # 4 - connecting the machine to the water supply
The most complex and critical part of the installation of a machine is connecting it to a water supply system.
Image Gallery
Photo from
Water hoses
Cold and hot water taps
Connection to a cold water supply line
Free access to cranes for maintenance
To perform a proper connection, you should:
- Assess the location of the unit to select the connection method, on which the selection of hoses, fittings, and fittings depends.
- When determining the required length of flexible pipes, it is important to consider that they should be placed behind furniture and plumbing fixtures so that they do not interfere with walking.
- As a rule, hoses are supplied with the machine, but their size is often insufficient. In this case, it is better to purchase extension cords that facilitate laying.
- The necessary elements for connecting to the water supply is also a ball valve for washing machines or a valve, the choice of which depends on the characteristics of the wiring.
Usually, the connection is made on a straight section of the pipeline, in this case a tee or a process of the pipe is used, to which a flexible connection from the toilet tank is attached.

Sometimes it is more convenient to use fasteners to the mixer when connecting cold water to it. It is also possible to connect the unit by means of an additionally purchased mortise clamp
Let us consider in more detail all the steps to connect the machine to the water supply network.
Preparation of materials and tools
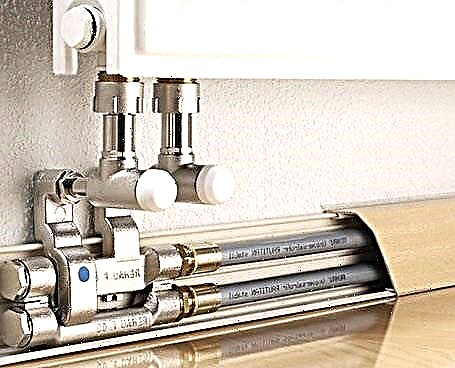
To connect to a metal pipeline, you will need gas and adjustable wrenches, as well as gaskets - FUM tape or combed linen. It is better to give preference to the latter, since it swells under the influence of moisture.

To connect the washing machine to the water supply system, you will need flexible hoses, fittings of various types, as well as all kinds of fittings
If we are talking about a tie-in to an internal water supply system made of polymers, you will have to use special equipment for soldering plastic pipes, a calibrator, and also special fittings designed for plastic and metal plastic.
Having prepared everything you need, you can proceed directly to connecting the washing machine to water.
Hose to the washing machine
First of all, connect the supplied or separately purchased hose directly to the unit. To do this, put the filter on the end of the hose - its convex edge should be directed towards the outlet of the washing machine.
Then you have to tighten the nut in the place of attachment of the hose to the device. Tightening is done manually, using keys is undesirable.

Rubber seals used with flexible eyeliner fasteners contribute to tight joints. It is important not to forget to put them in before tightening the nuts.
After that, it is possible to start connecting the machine to a source of water. In this case, several options are possible.
Connecting an "automatic" to the toilet tank
The easiest and fastest way to connect the washing unit to the water supply, which has become widespread. Instead of complicated installation operations, it is enough to take a few elementary steps, accessible even for a beginner.

The easiest way is to connect the machine to the water supply using the toilet bowl. This elementary manipulation is easily performed even by a novice master.
To connect you need:
- remove flexible eyeliner from the process of the pipe;
- screw fitting tee;
- connect to it a flexible eyeliner from the tank and a hose for supplying water to the washer through a valve or shut-off valve.
Unfortunately, this option cannot be used when installing the washing device in a separate bathroom or kitchen, since the automatic unit and the toilet should be in the same room, preferably at a small distance from each other.
Hose connection to the mixer
A popular option is also to connect the washing unit to the mixer, which can be used in almost any room.

Cold water can be supplied to the unit by connecting the machine to the mixer. This is a fairly easy way, which can be applied not only in the bathroom, but also in the kitchen.
For this method, a special version of the tee is required, the design of which provides for an installed ball valve.This part is installed in the space between the cold water supply branch in the mixer, the cold water supply to the same part.
This method is reliable and simple, but it has a significant minus, since the hose with which the plumbing is connected to the washer is always in sight. You can hide it by arranging a box with subsequent tiling.
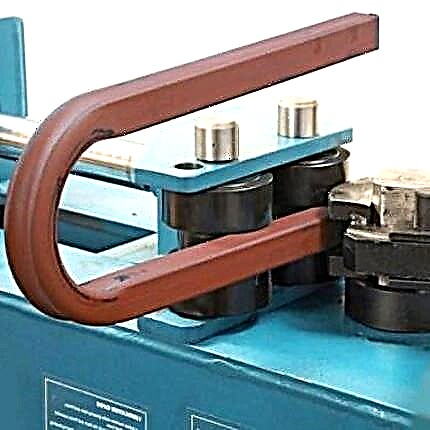
Subtleties of a pipe insert
Connecting the machine to communications made of metal-plastic or polypropylene can be carried out almost anywhere. To do this, it is enough to cut the pipe by installing a metal tee in place of the cut, thanks to which it is possible to branch the communication to the washing unit.

It is also possible to connect the washer to a siphon with a specialized pipe, designed just for connecting washing and dishwashers
One of the simplest and most convenient options for connecting the washer to the sewer outlet is to connect its hose to a special siphon equipped with a telescopic side pipe. In this case, it is enough to put the outlet hose on this “branch”, picking up the required diameter on it.
The following steps must be taken to complete this operation:
- cut the pipe;
- measure the fitting (tee) parameters;
- cut off a piece of pipe corresponding to the adapter;
- attach a connecting ring with a nut;
- using a special tool - a calibrator - flare the ends of the pipe at the points of connection with a tee;
- put the pipe on the fitting of the fitting;
- push the O-rings at both ends, then tighten the nuts firmly.
It is better to fasten the shut-off valve to the adapter in advance, before starting the tie-in. This will avoid damage to a sufficiently flexible metal-plastic pipe. At the end of connecting the tee to the screwed on tap, flexible water hoses are attached.
If a plastic pipe is installed in the apartment, a complicated version of connecting the washing machine will be required. In this case, to perform installation work, not only special fittings are needed, but also a special tool that allows you to solder pipe fasteners with adapters.
Here, a tee is installed on the cold water supply pipe, to which a hose is connected through a shut-off valve to supply water to the “machine”.
Connection to water supply in any place
In some cases, it is convenient to connect the washing device in a specific place in a straight pipe. To perform this operation, you will need a special adapter - a coupling saddle, which is a clamp from a clip with a threaded outlet.

This figure shows a schematic illustration of a saddle clutch, with which you can connect an automatic machine almost anywhere in a straight pipe
You can buy a similar element in specialized retail outlets, while it is important to pay attention to the diameter of the fitting, which must match the size of the pipe.

An integral part of the saddle is a collapsible clip: its design is assembled on a pipe in the place where the washer is connected to the water supply, and it is important to use a reliable gasket
The adapter firmly fixed to the desired fragment blocks the flow of water. After that, a hole is drilled through the saddle nozzle. A valve (ball valve) is screwed onto the outlet of the coupling, which is used to connect the hose supplying the washing machine with water.
For greater comfort during operation, it is also possible to connect an angle crane to the unit.
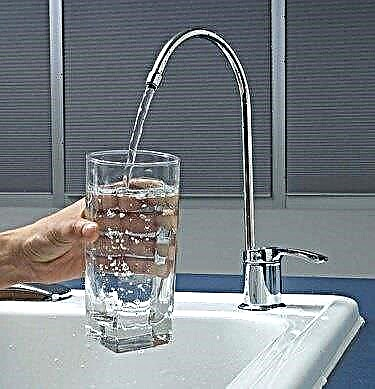
The nuances of using a washing machine without running water
The functioning of automated washing machines is possible in the case of water supply under pressure. The lack of running water in a private house or in the country does not mean abandoning the usual amenities, since in this case you can use an alternative solution.
To use a modern machine, it is enough to raise a volumetric water tank to a certain height (at least one meter), to the bottom of which you need to connect a hose leading to the appropriate branch of the unit. Water should be added to the tank in a timely manner.

You can radically solve the problem by purchasing a pumping station. True, because of the high price, this option is usually considered with permanent residence in a house without water supply.
Stage # 5 - Sewer Connection
Connecting the washing machine to the sewer system allows you to solve the problem of draining dirty water, which remains after washing.
You can do this using different schemes:
- Temporaryby using a special hose routed to the toilet or bathtub.
- Constantinvolving a stationary drain.
The first method is very simple: water is drained through a hose attached to the edge of the bathroom, toilet or sink, which can be done using special fixing elements.
In the second case, two options are possible. Drainage is carried out using a siphon of a special design, which provides a separate outlet for connecting automatic washing machines, located under the siphon elbow.
It is not worth replacing such a device with a conventional analogue, since it will retain the waste water, spreading an unpleasant odor.

This diagram shows the option of connecting the “machine” to the sewer system using a siphon of a special design, which provides a special outlet for the hose
The washing machine can also be connected without a siphon. When the diameter of the sewer pipe is 4-5 cm, the branch for the machine machine can be connected directly to this element.
In this case, the S-curved drain hose is inserted into the pipe so that it does not touch the sewage, and then it is carefully surrounded by a sealant and sealed. The distance from the inflection point to the floor should exceed 0.5 m.
The maximum hose length is usually indicated in the instructions supplied with the model. If you select a large part, the load on the pump will increase sharply, which can lead to unforeseen damage.
Image Gallery
Photo from
Washing machine drain hose
Outlet to the bath using a retainer
Sewer discharge
Siphon with pipe for connecting equipment
If the design of the washing unit does not provide for a check valve, then when installing the model, there is a limit on the height at which the drain hose is located. The manufacturer usually provides specific information in the instruction manual.
Stage # 6 - connection to the electric network
Specific information on how to properly connect the just purchased washing machine to the mains can be found in the instructions. Particular attention must be paid to safety rules, since the device has a high level of power consumption (1.5 - 2.5 kW), and also comes in contact with water.

To connect the unit to the mains, it is important to carefully select the outlet. The device must necessarily be grounded, in addition, it is advisable to choose a model with a cover
As a rule, to connect a washing machine with your own hands, you need a three-wire outlet in which there is a phase, zero and a carefully insulated ground wire. The switchboard is grounded by using a special bus with a cross section of at least 0.3 cm.
When connecting, it is advisable to follow a few recommendations:
- The best option - individual power supply. In this case, the washing machine is powered from the distribution panel by a separate input, and the electric power is supplied through additionally laid power cables. To prevent wires from spoiling the interior, they can be placed in neat plastic boxes.
- The use of specialized electrical protection devices. In addition to the obligatory circuit breakers, it is recommended to additionally install a residual current device (RCD) in the power line of the machine.
- Strict compliance of all components of electrical circuits with requirements/ technical / operational characteristics. For wiring, it is important to use three-core cables, while the cross-sectional area should exceed 1.5 sq.cm.
- Connection of the socket according to the schemespecified in the instructions. It is important to comply with the prerequisite - the presence of protective grounding. The connection of the wire is mandatory to the grounding bus of the distribution panel.
- Connecting a conductor to heating or plumbing communications is strictly prohibited, since this can lead not only to the failure of the machine, but also to the creation of emergency situations.
- It is better to give preference to sockets with IP44-IP65 when choosing models that have a high degree of security; it is desirable that they have a lid that protects against moisture, and a ceramic base.
- Extension cords, tees and adapters should be avoided. when connecting the washing machine: inevitable in this case, additional connections can provoke an increase in temperature in the contacts, which leads to breakdown of the unit.
It is undesirable for the machine outlet to be in rooms with constant high humidity. If the length of the electric cord is enough, it is better to place the power supply device in an adjacent space, for example, a corridor.
Image Gallery
Photo from
Minimum distance between outlet and washing machine
Grounding plug
Socket with grounding for a washing machine
Violation of the rules for operating the washing machine
Stage # 7 - test inclusion
Having completed all the work described above, it is necessary to verify the installation, starting the washing machine in turn to work in all modes.

The final stage of the work is to check all the systems of the washing machine. It should be carried out strictly according to the instructions and affect all aspects of the connection.
To do this, you need to inspect all the assembled nodes, and then conduct a test run of the machine without laundry, during which you need to pay attention to the following options:
- the period of time (it should be short) for which the tank is accumulated;
- lack of leaks;
- the correct functioning of the drain;
- uniform rotation of the drum;
- good spin;
- full heating of water, which is carried out after 5-7 minutes at the end of the set of water.
There should be no extraneous sounds at all stages of the unit.
You can install and connect to communications yourself not only a washing machine. We suggest that you familiarize yourself with the installation instructions for the dishwasher. The step-by-step guide proposed by us will provide effective assistance in the independent conduct of work.
The presented video explains in detail the process of connecting the unit to the water supply, electricity and sewage.
If it became necessary to connect the washer drain to the washbasin, then the detailed video instruction can be seen in the following video:
The subtleties of connecting the washing equipment to the sewer and the water supply system with your own hands without involving the master are discussed in the following video:
Just following the detailed instructions, which step by step describes how you can connect the washing machine to all communications with your own hands, it will be possible to cope with the installation of household appliances quickly and easily.
If you have doubts about your own strengths, then it is better to invite the master from the service department.
Tell us about how you installed and connected the washing machine with your own hands. Share technological nuances that are useful to site visitors. please leave comments, ask questions, post a photo on the topic of the article in the block form below.