Water heaters using natural or liquefied gas cannot be connected to the gas pipeline without the permission of the relevant services. But no one forbids you to install a boiler and connect it with your own hands to an individual heating system of a country house or apartment. Prerequisite: installation of a wall-mounted gas boiler must be carried out in accordance with the requirements of current standards and not contradict design documentation.
Heat generator placement - room requirements
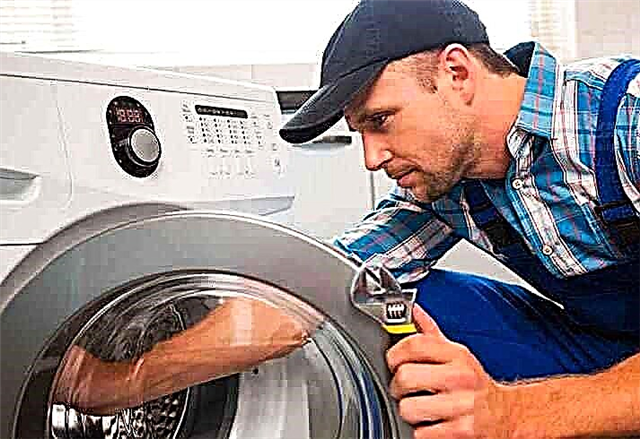
Gas-fired heating equipment is much easier to install than to issue permits and put into operation. We propose to consider just the first question - the independent installation of a wall-mounted gas boiler in an apartment or private house. The algorithm of actions for obtaining technical conditions and project development was given in the installation instructions for a dual-circuit heat generator.
The requirements of the room standards for the location of a gas heating unit are as follows:
- The heater must not be installed in living rooms and the bathroom. The hinged boiler is allowed to be placed in the corridor, in the kitchen and other non-residential premises on any floor, an external extension or a separate boiler room.

- If the wall-mounted heat generator operates on a liquefied propane-butane mixture from cylinders or a gas tank, it cannot be installed in the basement of a private house.
- The minimum ceiling height is 2 m, volume - 7.5 m³. If there is a natural gas water heater in the room, then the requirements are tightened: the height of the ceilings should reach 2.5 m, the volume - 13.5 m3.
- The room should have windows facing the street. The minimum dimensions of the glazed part are calculated as follows: the volume of the room is multiplied by 0.03, we get the area of the translucent structure in m².
- When the furnace is installed, the supply and exhaust ventilation is necessarily provided. Within 1 hour, the room air should be updated three times (3-fold air exchange). To the inflow volume we add the air consumed by the burner to burn fuel. In the kitchen, a window is made for ventilation.
- The minimum distance from the front panel of the suspended boiler to the wall or other objects is 1250 mm (passage width).


Clarification. In the kitchen, you can have a gas heater with a capacity of up to 60 kW, in other interior rooms - up to 150 kW. The heating capacity of the equipment in the outdoor boiler room is not limited.
The above rules apply equally to all types of heating units - wall and floor, with an open and closed combustion chamber. The installation location of the boiler must be agreed with the engineer who is developing your project. The designer will tell you where it is better to hang the boiler, given the location of the gas pipe.
How to install a wall boiler
Before installation, unpack the heat generator and check the completeness of the device. Make sure that the standard fasteners fit your walls. For example, special fasteners are needed for aerated concrete; ordinary dowels are not suitable.
We observe the following order of work:
- Mark the outline of the heating unit on the wall. Make sure that the technological margins from building structures or other surfaces are observed: 0.5 m from the ceiling, from the bottom - 0.3 m, from the sides - 0.2 m. Typically, the manufacturer provides a diagram with the dimensions in the operating instructions.

- For a turbo boiler with a closed chamber, we prepare a hole for a coaxial chimney. We drill it at a slope of 2–3 ° in the direction of the street so that the condensate formed flows out.The installation process of such a pipe is described in detail by us separately.
- Complete with a heat generator is a paper installation template with the intended holes. Attach a sketch to the wall, level it using the building level, fix the scheme with tape.
- Drilling points are better to immediately tilt. Remove the template and make holes with a depth of 50–80 mm. Make sure that the drill does not go to the side, this happens on brick partitions.
- Install plastic plugs in the holes, screw the hanging hooks to the maximum depth, using pliers. Together with the assistant, gently hang the device.


An important point. When installing a wall-mounted boiler in a wooden house, the wall should be protected from fire, these are the requirements of the norms. A sheet of roofing steel is mounted between the rear panel of the unit and the combustible structure, protruding beyond the housing by 100 mm, as shown in the photo.
When marking the holes in a wooden log wall, make sure that the mount is on the crest of the log. Screw the hooks directly into the tree, without plastic plugs.
Heating unit piping diagrams
A wall gas boiler with a closed combustion chamber (turbocharged) is connected to 3 engineering networks of a country house / apartment:
- heating;
- electric;
- smoke outlet.
Atmospheric heat generators (open chamber), which take combustion air from the room, are connected to a traditional chimney. If you need to use a single-circuit unit for the preparation of domestic water (DHW), one more connection is added - to the indirect heating boiler.
First, consider the option of connecting the boiler to a radiator heating system or underfloor heating. The following pipe fittings will be required for strapping:
- ball valve with internal thread ¾ inch and American - 5 pcs.;
- ordinary tap ¾ to the feed / discharge line;
- water filter mud;
- filter for gas pipelines (if the heater is placed far from the gas meter or in the apartment);
- connecting fittings - according to an individual scheme;
- cable with 3 copper conductors with a section of 2.5 mm² of the VVG brand or similar;
- 2-pole circuit breaker.

Addition. If the amount of coolant in the system exceeds 70 liters, an additional expansion tank will be needed. To install the tank, purchase 2 more ball valves - shut-off and drain.
We do the tying of the wall-mounted boiler according to the typical scheme below. We fasten the cranes to the fittings of the device with the Americans down, then connect the pipes. We put the mud sump on the heating return, in front of it is a tap that allows you to clean the filter grid without emptying the system. It will also allow you to remove the entire boiler in the event of a major overhaul or replacement.
4 useful tips:
- It is more convenient to screw the shut-off valves to the wall-mounted heat generator in the removed state, that is, before fixing the device to the wall. Pre-remove the handles so that they do not interfere with turning the valves.
- The sump is always placed horizontally, with the cork down.
- An external expansion tank is connected to the return heating line. We put a shut-off valve, a tee and a drain cock in front of the tank. It is easier to remove the tank (for example, for the purpose of replacement).
- We feed the feed line with a tap at the lowest point of the return pipe.

Connection to indirect heating boiler
Many manufacturers supply wall-mounted gas heaters with nozzles for connecting a boiler. There will be no difficulties: we buy 2 ½ ”ball valves with Americans and we connect a water heater heat exchanger. You will also need a laid on thermostat with a temperature sensor installed in a special boiler sleeve. From it we lay an electric cable to the corresponding terminals of the boiler.
When there are no fittings for an indirect water heater, we purchase a three-way valve with an electric actuator.Connecting the wall unit to the boiler is performed according to the scheme:

How such a scheme works:
- DHW tank heating is always a priority. After the first start-up, the boiler first heats the water in the boiler, then switches to heating.
- As water is taken, the tank cools, the sensor detects a decrease in temperature, the thermostat closes the circuit. The boiler controller sends a signal to the three-way valve, which switches the entire coolant to the heater coil.
- When the water in the tank is heated to a predetermined temperature, the thermostat will break the electrical circuit, the valve will again direct the coolant to the batteries or to the underfloor heating circuits.
An important nuance. When heating the hot water tank, the boiler automatically turns on at full power, so loading the boiler takes 15-30 minutes, depending on the volume. Returning to the heating mode, the unit reduces the performance in accordance with your settings.
How to connect 2 boilers - wall mounted gas and solid fuel
In this case, a parallel connection method is used. The problem is different - how to coordinate the work of heat generators so that they start and turn off automatically. We offer a typical circuit with 2 non-return valves, a thermostat and a room temperature controller.

How does it work:
- TT boiler is the main one. While it maintains the temperature in the rooms, the gas boiler is in standby mode.
- After burning solid fuel, the flow temperature decreases. When it drops below 40 ° C, the thermostat will stop the circulation pump of the wood heat generator.
- At the same time, indoor air temperature decreases. When it reaches the set threshold (for example, 20 ° C), the room thermostat closes the circuit and starts the gas boiler.
Similarly, you can tie 2 other wall-mounted heaters - electric and gas. If you want to connect an indirect boiler, radiators and underfloor heating to two sources of heat, we recommend using the primary-secondary ring scheme shown in the picture.

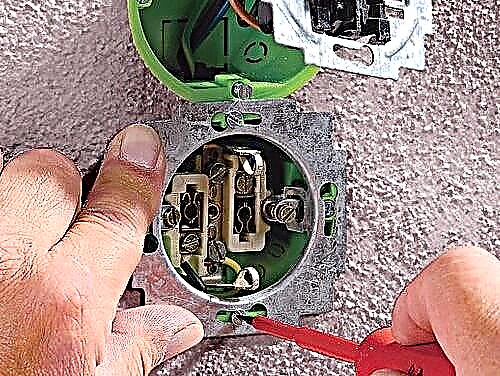
Power Connection
The wall-mounted water heater is a mini-boiler room with its own electronic control unit, circulation pump and safety group. The boiler can’t just be plugged into the first outlet that comes across, a separate cable power line should be laid, protected by a two-pole circuit breaker, as shown in the diagram.

Recommendations for installation and connection:
- Route the cable inside the plastic corrugated pipe.
- Think of the route so that the wiring does not appear under the pipes of water supply or heating. Avoid water ingress in the event of an accident or discharge from the safety valve.
- Be sure to connect the third core of the cable to the ground loop. By the way, steel pipes in an apartment cannot serve as such.
- It is better to organize the power supply of the boiler through the “uninterruptible” - UPS unit. Otherwise, after turning off the light, you risk being left without heat in the house.
Tip. Some wall-mounted imported boilers may be "capricious" due to improper phase arrangement. If after switching on the unit does not want to start, try interchanging the neutral and phase wires.
Conclusion
As you can see, the installation of a wall-mounted gas boiler is quite accessible to the average user who knows how to handle plumbing. We did not talk about connecting the chimney, since this topic is quite extensive and is covered in detail in a separate manual. And one more thing: when installing a condensation boiler, you will have to lay an additional pipe to drain the condensate. How to do this correctly is indicated in the instruction manual.